Tutorial: Expose an Istio gateway with the inlets-operator
In this tutorial we will configure the inlets-operator to get a public IP for the Istio Ingress Gateway. This will allow you to receive HTTPS certificates via LetsEncrypt and cert-manager and access services running in your cluster on their own public domain.
Install arkade
Arkade is a simple CLI tool that provides a quick way to install various apps and download common binaries much quicker.
To install arkade run:
curl -sSLf https://get.arkade.dev/ | sudo sh
Create a kubernetes cluster with kinD
We're going to use KinD, which runs inside a container with Docker for Mac or the Docker daemon. MacOS cannot actually run containers or Kubernetes itself, so projects like Docker for Mac create a small Linux VM and hide it away.
Download the kind and kubectl binaries if you don't have them already:
arkade get kind
arkade get kubectl
Now create a cluster:
$ kind create cluster
The initial creation could take a few minutes, but subsequent clusters creations are much faster.
Creating cluster "kind" ...
 ✓ Ensuring node image (kindest/node:v1.19.0) 🖼
 ✓ Preparing nodes 📦
 ✓ Writing configuration 📜
 ✓ Starting control-plane 🕹️
 ✓ Installing CNI 🔌
 ✓ Installing StorageClass 💾
Set kubectl context to "kind-kind"
You can now use your cluster with:

kubectl cluster-info --context kind-kind

Have a nice day! 👋
kubectl get node -o wide

NAME                 STATUS     ROLES    AGE   VERSION   INTERNAL-IP   EXTERNAL-IP   OS-IMAGE       KERNEL-VERSION     CONTAINER-RUNTIME
kind-control-plane      Ready   master   35s   v1.18.0   172.17.0.2    <none>        Ubuntu 19.10   5.3.0-26-generic   containerd://1.3.2
The above shows one node is Ready, so we can move on and install Istio.
Install Istio
You can install Istio using the documentation site at Istio.io, but we're going to use arkade instead since it gives us a one-line install and also bundles a version of Istio configuration for constrained development environments like a KinD cluster.
It is always possible to use the --set flag to override or pass in additional values for the Istio chart.
arkade install istio --help

Install istio

Usage:
  arkade install istio [flags]

Examples:
  arkade install istio --loadbalancer

Flags:
      --cpu string               Allocate CPU resource (default "100m")
  -h, --help                     help for istio
      --istio-namespace string   Namespace for the app (default "istio-system")
      --memory string            Allocate Memory resource (default "100Mi")
      --namespace string         Namespace for the app (default "default")
      --profile string           Set istio profile (default "default")
      --set stringArray          Use custom flags or override existing flags
                                 (example --set prometheus.enabled=false)
  -v, --version string           Specify a version of Istio (default "1.11.4")

Global Flags:
      --kubeconfig string   Local path for your kubeconfig file
      --wait                If we should wait for the resource to be ready before returning (helm3 only, default false)
Install Istio:
arkade install istio
At the moment we don't have a public IP for the Istio gateway. The next step is te install the inlets operator so we can get one.
kubectl get -n istio-system \
  svc/istio-ingressgateway

NAME                   TYPE           CLUSTER-IP     EXTERNAL-IP   PORT(S)                                      AGE
istio-ingressgateway   LoadBalancer   10.43.92.145   <pending>     15021:32382/TCP,80:31487/TCP,443:31692/TCP   3m28s
Install the inlets-operator
The inlets-operator lets you get public LoadBalancers on your local Kubernetes cluster. It does this by creating a VM to run an inlets tunnel server in the cloud of your choice for each LoadBalancer. It then plumbs in an inlets client to connect to it using a deployment.
The inlets-operator can also be installed with arkade.
Save an access token for your cloud provider as $HOME/access-token, in this example we're using DigitalOcean. Other providers may also need a secret token in addition to the API key.
Your inlets license should be already saved at: $HOME/.inlets/LICENSE, if it's not, you can move it there or use the --license-file flag.
export ACCESS_TOKEN=$HOME/access-token

arkade install inlets-operator \
 --provider digitalocean \
 --region lon1 \
 --token-file $ACCESS_TOKEN \
 --license-file "$HOME/.inlets/LICENSE"
You can run
arkade install inlets-operator --helpto see a list of other cloud providers or take a look at the inlets-operator reference documentation.
- Set the
--regionflag as required, it's best to have low latency between your current location and where the exit-servers will be provisioned.
Once the inlets-operator is installed we can start watching for the public IP to appear.
kubectl get -n istio-system \
  svc/istio-ingressgateway -w

NAME                   TYPE           CLUSTER-IP     EXTERNAL-IP
istio-ingressgateway   LoadBalancer   10.106.220.170   <pending>
istio-ingressgateway   LoadBalancer   10.106.220.170   165.227.237.77
Install cert-manager
Install cert-manager, which can be integrated with Istio gateways to manage TLS certificates.
arkade install cert-manager
A quick recap
This is what we have so far:
-
Istio
The istio service mesh. Among other things, it comes with the istio Ingress Gateway that will get a public address via an inlets tunnel.
-
inlets-operator
The inlets operator provides us with a public VirtualIP for the istio Ingress Gateway
-
cert-manager
Integrates with Istio gateways to provide TLS certificates through the HTTP01 or DNS01 challenges from LetsEncrypt.
Deploy an application and get a TLS certificate
Istio uses the Bookinfo Application as an example in their documentation. We will also use this example.
Enable side-car injection and then deploy the BookInfo manifests:
kubectl label namespace default istio-injection=enabled

kubectl apply -f https://raw.githubusercontent.com/istio/istio/release-1.15/samples/bookinfo/platform/kube/bookinfo.yaml

kubectl apply -f https://raw.githubusercontent.com/istio/istio/release-1.15/samples/bookinfo/networking/bookinfo-gateway.yaml
We can verify that the book application is up and running and accessible form our local computer on local host by running:
kubectl port-forward -n istio-system \
  svc/istio-ingressgateway 31380:80
Then send a request to it with curl:
curl -sS http://127.0.0.1:31380/productpage | grep -o "<title>.*</title>"
<title>Simple Bookstore App</title>
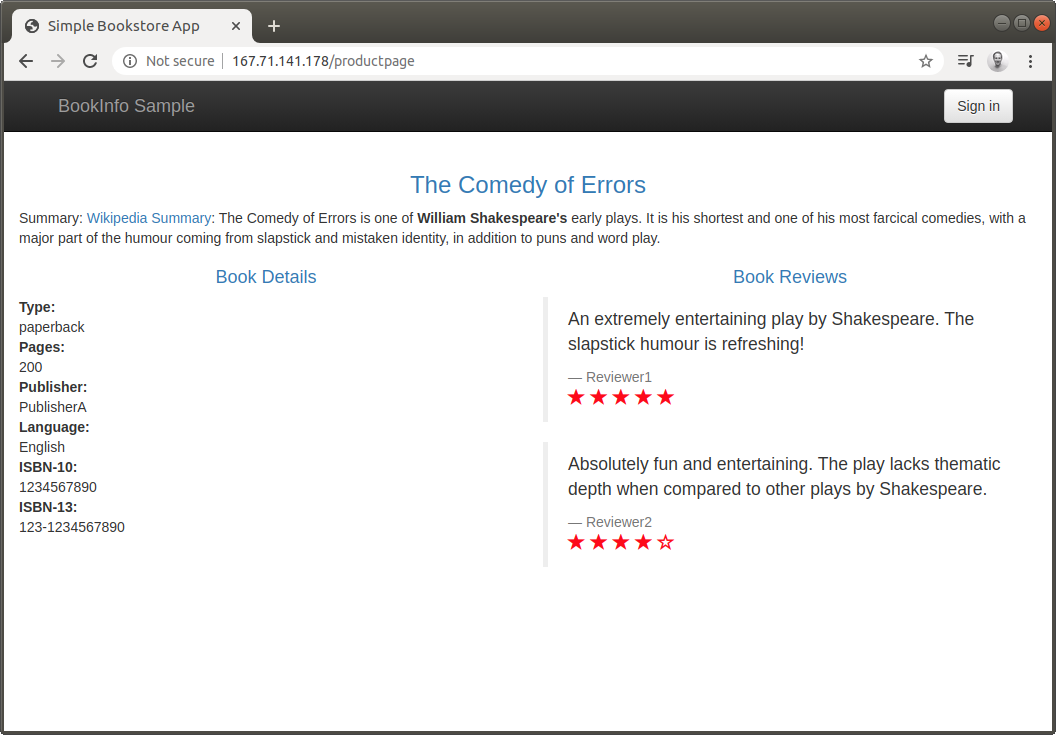
Since we set up the inlets operator in the previous step to get an external IP for the Istio ingress gateway we should now also be able to access the app using that public IP.
Open a browser and navigate to the /productpage URL using the EXTERNAL-IP:
http://165.227.237.77/productpage
TLS certificates require a domain name and DNS A or CNAME entry. You can create those in the admin panel of your provider. They should point to the external IP of the Istio Ingress gateway. We will use the bookinfo.example.com domain as an example.
export EMAIL="you@example.com"

cat > issuer-prod.yaml <<EOF
apiVersion: cert-manager.io/v1
kind: ClusterIssuer
metadata:
  name: letsencrypt-prod
spec:
  acme:
    server: https://acme-v02.api.letsencrypt.org/directory
    email: $EMAIL
    privateKeySecretRef:
      name: letsencrypt-prod
    solvers:
    - selector: {}
      http01:
        ingress:
          class: istio
EOF
Note that ingress class is set to class: istio.
We are using the Let's Encrypt production server which has strict limits on the API. A staging server is also available at https://acme-staging-v02.api.letsencrypt.org/directory. If you are creating a lot of certificates while testing a deployment it would be better to use the staging server.
Edit email, then run: kubectl apply -f issuer-prod.yaml.
Create a new certificate resource
apiVersion: cert-manager.io/v1
kind: Certificate
metadata:
  name: ingress-cert
  namespace: istio-system
spec:
  secretName: ingress-cert
  commonName: bookinfo.example.com
  dnsNames:
  - bookinfo.example.com
  issuerRef:
    name: letsencrypt-prod
    kind: ClusterIssuer
Edit the bookinfo gateway, kubectl edit gateway/bookinfo-gateway and reference the certificate secret in the TLS configuration under credentialName.
apiVersion: networking.istio.io/v1beta1
kind: Gateway
metadata:
  name: bookinfo-gateway
spec:
  selector:
    istio: ingressgateway # use istio default controller
  servers:
  - port:
      number: 443
      name: https
      protocol: HTTPS
    tls:
      mode: SIMPLE
      credentialName: ingress-cert # This should match the Certificate secretName
    hosts:
    - bookinfo.example.com
You can always checkout the Istio documentation for more information on how to integrate cert-manager.
We can use curl again to access the bookinfo application this time with our custom domain and over a secure connection. Alternatively you can open the URL in your browser.
curl -sS https://bookinfo.example.com/productpage | grep -o "<title>.*</title>"
<title>Simple Bookstore App</title>
Wrapping up
Through the use of the inlets-operator we were able to get a public IP for the Istio Ingress gateway. This allows you to access services on your cluster whether you are running it in an on-premises datacenter, within a VM or on your local laptop.
There is no need to open a firewall port, set-up port-forwarding rules, configure dynamic DNS or any of the usual hacks. You will get a public IP and it will "just work" for any TCP traffic you may have.